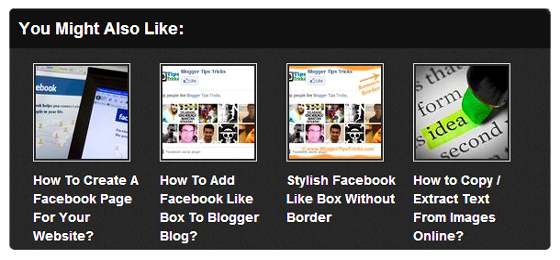
Showing related posts with thumbnail below your post body is very important if you want to increase your blog page views. It also helps to reduce bounce rate of blog. Once your visitors finish reading the article, they will be keen to read more about related topic. It’s a best practice to show more related posts in blogger blog which help to increase reader engagement in reading more posts and they will stay at your blog for longer time. And if they stay at your blog for longer time then it will be a plus point to your blog which helps to improve its ranking in search engines as Google considered visit time as a ranking factor. Let see how to add this widget into your blog.
Add LinkWithin To Blogger
- Go to Linkwithin.
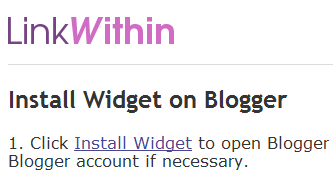
- Fill some easy information and click on Get Widget button. See below screenshot.
- A page will open. Now click on Install Widget link.
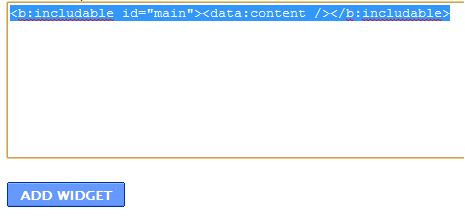
- Next click on Edit Template link.
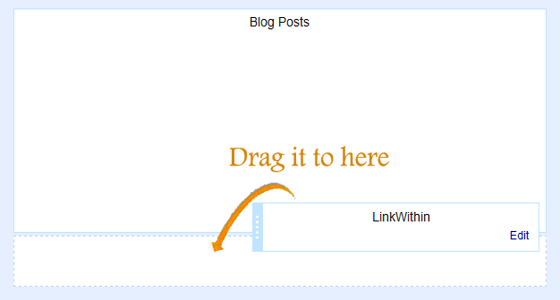
- Now click on Add Widget button and drag the gadget below post body. See below screenshot.
- Click the save arrangement button and you are done!
- And then set following setting.


1. Go to your Blogger Dashboard
2. Click Dashboard > Template
3. Click Edit HTML and Proceed
4. Make sure that Expand Widget Template is checked
5. Search for “Linkwithin” and you will find a code like below
2. Click Dashboard > Template
3. Click Edit HTML and Proceed
4. Make sure that Expand Widget Template is checked
5. Search for “Linkwithin” and you will find a code like below
<b:section id='sidebar-main' preferred='yes'>
<b:widget id='HTML7' locked='false' title='LinkWithin' type='HTML'>
<b:includable id='main'><data:content/></b:includable>
</b:widget>
</b:section>
6. Add the code so it become like'
<b:section id='sidebar-main' preferred='yes'>
<b:widget id='HTML7' locked='false' title='LinkWithin' type='HTML'>
<b:includable id='main'>
<b:if cond='data:blog.pageType == "item"'><data:content/></b:if>
</b:includable>
</b:widget>
</b:section>
Now done!!
It this time it will look very dull like this:


To make it stylish and beautiful we have to add some CSS code into our blog template. So, let see how to do it.
Apply CSS To Change Look
Now the interesting part is applying CSS to make over the default dull gadget to a stylish related posts widget. Let see how to add related post plugin code in blogger.
- Log in to your blogger account.
- Go to Template.
- Backup blog template before doing any changes.
- Click on Edit HTML > Proceed.
- Search this code ]]> and replace it with the below code.
- Click on save template button.
- Done!
/*—Related Posts—*/
#linkwithin_logolink_0 {
display:none!important;
}
#lws_0 {
clear: both!important;
margin: 0 0 20px 0!important;
}
.linkwithin_outer {
margin: 1px 0px !important;
background:url(“https://blogger.googleusercontent.com/img/b/R29vZ2xl/AVvXsEi5Y09f7t4nSgtJWhGNnuBSyT_QhBG2QOv2pDyg8U2ycCLVK0N-BylyPLnAbQSbzm3gNhjySuhnq1ZQHyHoC_mfWyIvjGSkSmSwwbNJG_h_E3DBm7u5Mct2T3yYRxae2uvASH-8UrW5gFU/s400/mbt-related-posts.gif”) repeat scroll rgb(42, 42, 42);
height: 260px;
width:590px!important;
padding: 0px !important;
box-shadow: 0px 4px 4px -4px rgba(0, 0, 0, 0.7) !important;
border-radius: 5px 5px 5px 5px;
}.linkwithin_inner {
width:590px!important;
}.linkwithin_text {
margin: 0px !important;
padding: 10px !important;
font-family: “Droid Sans”,Helvetica,Arial,sans-serif;
font-size: 1.35em;
color: rgb(255, 255, 255);
font-weight: 700;
line-height: 1.35em;
text-transform: capitalize;
background-color: rgb(18, 18, 18);
border-bottom: 1px solid rgb(0, 0, 0);
border-top-right-radius: 5px;
border-top-left-radius: 5px;
background-image: -moz-linear-gradient(center top , rgb(36, 36, 36), rgb(18, 18, 18));
}
.linkwithin_posts a {
border-right:0px!important;
margin: 10px 0px 10px 20px !important;
}.linkwithin_posts a:hover {
border-right:0px!important;
margin: 10px 0px 10px 20px !important; background:none!important;
}
#linkwithin_logo_0 {display:none;}
.linkwithin_img_0 {
border: 1px solid #666 !important;
padding: 1px !important;
width: 100px !important;
height: 70px !important;
margin-right: 20px !important;
overflow: hidden;
background:#666!important;
}
.linkwithin_img_0:hover {
border: 1px solid #666!important;
opacity:0.8;
}
.linkwithin_img_0 div {
width: 100px !important;
height: 70px !important;
}
.linkwithin_title {
color: rgb(255, 255, 255) !important;
font-size: 1.1em !important;
display: block;
padding: 0px 10px 0px 0px !important;
font-weight: 700 !important;
line-height: 1.45em !important;
margin-top: 10px !important;
font-family: “Droid Sans”,Helvetica,Arial,sans-serif !important;
text-decoration:none!important;
width:120px!important;
}
.linkwithin_title:hover {
text-decoration:underline!important;
}
]]>
Congratulation! Now the default linkwithin widget is converted into a stylish related posts widget that will fetch the posts from the same label and show similar posts at the end of your post body.
Need Help?
If you have any doubt about this gadget then feel free to ask me. I will try to solve your all queries. Friends if you like this related posts with thumbnail gadget then please share this post. It will encourage me to write more interesting posts for you. Thanks!


0 comments:
Post a Comment